Last updated November 18, 2026
Home Addition Contractor Maintenance Schedule: What to Do and When
Contractors hand you keys and walk away. Nobody gives you a calendar that says: check this caulk joint in October, test this circuit in March, look at this roofline after the first hard rain. That silence costs homeowners real money, because the first twelve months after a home addition is finished is the most important maintenance window you will ever have. In Paradise, where summer UV bakes sealants and winter freeze-thaw cycles work slowly on every exterior joint, that first year decides whether small issues stay small. Here is the month-by-month routine that turns the silence into a concrete plan.
Quick Answer
After a home addition is completed, you should inspect caulk and flashing at the old-to-new roofline at 90 days, test new electrical circuits by March, wait 60 – 90 days before final drywall and paint touch-ups, and log every check in a paper record you keep for resale and warranty claims. The first year is a settling period, not a finished state, and the schedule below maps it month by month for Paradise homes.
Table of Contents
- Why the First Year Matters More Than Any Other
- The Month-by-Month First-Year Checklist
- The Roofline Junction: Why 90 Days, Not Closeout
- Testing Your Electrical Additions Before the Warranty Closes
- The Paint and Drywall Touch-Up Window
- Seasonal Checks: UV, Freeze-Thaw, and Monsoon
- The Paper Log That Pays You Back at Resale
- Common Mistakes to Avoid
Why the First Year Matters More Than Any Other
New construction moves. Wood framing shrinks as it dries, drywall settles against studs, caulk cures and pulls back from joints, and concrete slabs shift a fraction as the ground beneath them adjusts to the load. These are not defects. They are normal behaviors of materials finding their final position. The problem is that nobody tells homeowners what to look for during that settling window, so small gaps stay small until they don’t.
In Paradise, the settling story has two local twists. First, summer UV exposure here is brutal on exterior sealants. A bead of caulk that would last three years in a milder climate can chalk and crack in half that time if the sun hits it hard and nobody checks it. Second, our freeze-thaw cycles are mild compared to northern states but real enough to open hairline cracks in exterior joints that water finds every winter. A home addition built in Paradise needs eyes on its exterior at specific intervals, not once at closeout.
The home addition work we connect homeowners with through our Paradise home addition contractor page ends with a walkthrough, but the maintenance relationship is just beginning. Our technicians have up to 25 years of experience, and they will tell you the same thing: the families who keep a simple log and do the checks below spend far less on repairs in year three than the families who don’t.
The Month-by-Month First-Year Checklist
This schedule assumes the addition was completed in any month, so the months are counted from completion rather than from the calendar. Adjust the seasonal checks to whichever calendar month your completion date lands on.
- Month 1: Walk the interior perimeter of the new space and note any new drywall cracks, especially at corners and above doorways. Photograph them even if they are hairline. Do not patch yet.
- Month 2: Check every exterior door and window for smooth operation. New weatherstripping often needs a quarter turn of adjustment as frames settle.
- Month 3: Inspect the caulk and flashing at the roofline junction where the addition meets the original house. This is the single most important check in the first year, and the next section explains why.
- Month 4: Test every new electrical outlet and switch. Note any circuit that trips a breaker. Keep a running list rather than resetting and forgetting.
- Month 5: Check the HVAC balance. Feel the air at vents in the new space against vents in the original home. Notice any room that runs warmer or cooler than the rest.
- Month 6: Inspect exterior paint and siding joints on the sun-facing walls. Paradise UV degrades south- and west-facing surfaces first.
- Month 7: Look at the roofline again, this time specifically after the first hard rain of the season. Water staining, softened flashing, or a drip line in the soil below tells you something shifted.
- Month 8: Begin final paint and drywall touch-ups. The next section on the touch-up window explains why this comes now and not at punch list.
- Month 9: Check the foundation and slab edges for new cracks. Small shrinkage cracks are normal; anything wider than a hairline deserves a professional look.
- Month 10: Test smoke and carbon monoxide detectors in the new space, and confirm any new circuits dedicated to them work under load.
- Month 11: Do a full exterior caulk walk. Re-caulk any joint that has pulled back. Paradise sun will have shown you which joints need it.
- Month 12: Review your log against your warranty terms. Any item still open goes on the warranty conversation list before the 365-Day Done Right Promise window closes.
The families adding a new home on their lot through our Paradise ADU builders page often run this same schedule on their ADU, which follows nearly identical settling patterns because it is wood-framed and finished the same way.
The Roofline Junction: Why 90 Days, Not Closeout
The old-to-new roofline junction is where the addition’s roof meets the original house. It is the highest-risk seam on the entire project, and for a specific reason: it is the one place where new building meets old settling building, and the two move at different rates. At closeout, the flashing and caulk there are fresh and tight. By month three, the framing has dried and shrunk just enough to open a gap you cannot see from the ground. If that gap stays open through a winter, water finds it, and the damage starts inside the wall where nobody thinks to look.
At 90 days, get on the roof or hire someone who will, and check three things:
- The caulk bead along the junction: look for pulling back from either surface, cracking, or gaps at the end stops.
- The flashing: confirm it still sits flat against both roof planes with no lifting, and no fasteners backing out.
- The shingles at the transition: check for lifted edges or missing sealant where the two roofs meet.
Closeout inspection is done from below, from inside the attic, in most projects. The 90-day check is done from above, from the roof, with the building settled. That difference is why the check belongs in your calendar even though the contractor already inspected the same seam at the walkthrough.
Testing Your Electrical Additions Before the Warranty Closes
New circuits and any new subpanel need to be tested under real household load, not just at the moment of inspection. A circuit that passes a plug tester can still create nuisance trips once the space is fully furnished and a space heater, a treadmill, and a hair dryer share a circuit. Testing before the warranty closes means any issue gets resolved under the warranty rather than on your own dime.
Do this once in month four and again in month ten, and keep the results in your log:
- Turn on every appliance and device belonging to the new space at the same time. Note which breaker, if any, trips.
- Flip each breaker one at a time and confirm you know which outlets and fixtures go dark. A written map is invaluable later.
- Run a space heater on full for 20 minutes on each new circuit, then check the outlet face and the plug for unusual warmth. Warm is normal; hot to the touch is not, and that is a call to a licensed electrician.
- If your project added a subpanel, confirm the main breaker position and that every new circuit is labeled on the panel door. Unlabeled breakers are the single most common thing a future buyer asks about and the previous owner cannot answer.
Electrical work is not a do-it-yourself project. Every panel, circuit, and outlet we connect homeowners with in Paradise is installed by a licensed and insured local professional working to state requirements. If anything in the test above feels wrong, stop and call a licensed electrician rather than probing the panel yourself.
The Paint and Drywall Touch-Up Window
Here is the counterintuitive part: do not ask for final cosmetic touch-ups at punch list. Wait 60 to 90 days. New drywall and joint compound continue to cure and shrink for weeks after the project closes, and new paint cures to its final color over a similar window. Touch up a hairline crack on day three and the same crack reappears a month later, now with two layers of mismatched paint over it. Wait 60 to 90 days, let the building finish moving, and the touch-up you do then is the one that lasts.
What belongs in the 60 – 90 day window:
- Hairline cracks at drywall corners, above door frames, and where new meets old walls.
- Nail pops, which are small and normal but should be filled and painted after the wall has settled.
- Paint touch-ups at trim edges, outlet covers, and any spot that shows a shadow line from the settling.
- Caulk lines inside the home along baseboards and window casings, checked once the exterior caulk walk is done so you catch interior and exterior issues together.
If your project was a garage conversion, the concrete floor deserves a separate look in this same window. Our garage conversion contractor team in Paradise will tell you the slab is not going to move much, but the seam between new flooring and the original garage slab is worth a close look at 60 days.
Seasonal Checks: UV, Freeze-Thaw, and Monsoon
Once the first year is over, maintenance does not end. It becomes a seasonal rhythm tuned to Paradise’s climate. Three forces do most of the wear here.
Summer UV. Between May and September, exterior caulk, paint, and any plastic or rubber component ages fastest. Walk the exterior of your addition once in June and once in August, and look specifically at south- and west-facing joints. A bead that still looks fine in shade may be cracked in full sun.
Freeze-thaw. Paradise winters are mild but real. Water that gets into a hairline crack in December expands overnight and widens the crack by morning. Check every exterior joint once before the first freeze and once after the last thaw. The joint you find in November is a five-minute fix; the same joint in March can mean a siding repair.
Monsoon and heavy rain. After any storm that drops standing water, check the soil grade and drainage away from the addition. Water pooling against the foundation or new patio is the fastest way to undermine the slab edges. Gutter downspouts on the addition should discharge well away from the building, and that angle changes as the soil settles in the first year.
For families with kids and pets, this is also the time to check that any new exterior doors and gates still latch firmly and that the caulk inside pet-reachable areas is the pet-safe variety where the original crew used it.
The Paper Log That Pays You Back at Resale
A simple paper log is one of the most valuable things you can keep about your home addition. It does two jobs. First, it protects you in any warranty conversation, because a dated record of what you checked and when is evidence of responsible care. Second, it increases buyer confidence at resale, because a buyer looking at a home addition with a maintenance record can see that the home was cared for, not just finished. Buyers pay for certainty.
Keep it on paper, in a binder, in the same place as your project documents. One page per check is plenty.
- Date: the calendar date of the check.
- Item checked: roofline junction, exterior caulk, electrical test, HVAC balance, drywall, and so on.
- Observation: what you saw. One sentence. “Caulk at NE corner starting to pull back” is enough.
- Action taken: re-caulked, noted for warranty call, no action needed.
- Photo reference: a phone photo dated and filed under that same date.
- Who did the work: company name and date, if a professional was involved.
The brands serious ADU buyers research before calling anyone, including Cover, Dvele, and Mighty Buildings, all ship with their own maintenance expectations. Keeping those alongside your own log means you have one binder that covers both the addition and any ADU on your lot. If you are still planning rather than maintaining, our Seedling ADU Builders Paradise home page gives you the starting point.
Common Mistakes to Avoid
- Doing final drywall touch-ups at punch list. The cracks come back within weeks. Wait 60 – 90 days, let the building settle, and the touch-up holds.
- Never checking the roofline from above. A closeout inspection from inside the attic will not reveal a gap that opens from the top. Get on the roof at 90 days or hire someone who will.
- Resetting tripped breakers without logging them. A nuisance trip is information. Note the date, the circuit, and the appliances running, and you can show the electrician exactly what happened.
- Skipping the exterior caulk walk in Paradise’s summer. Our UV degrades sun-facing joints faster than most homeowners expect. Two walks a year, June and August, keeps the exterior sealed.
- Not photographing hairline cracks at month one. Without a month-one photo, you cannot tell a normal shrinkage crack from a new one at month six. Photos cost nothing.
- Discarding the manufacturer paperwork. Prefab panels, windows, and appliances have their own warranty terms separate from the build. File them with your log.
- Waiting until month eleven to think about the warranty. Any open item you want covered under the 365-Day Done Right Promise should be on the list by month ten, not discovered the week before the window closes.
When to Call a Professional
Some checks are yours. Others should always go to a licensed professional. Call a pro if you see water staining on a ceiling or wall, if the roofline flashing has visibly lifted, if a breaker trips repeatedly under normal load, if you find a foundation crack wider than a hairline, or if the HVAC balance is off by more than a few degrees between rooms. Electrical and roofing work carries genuine risk, and neither is a job for a homeowner with a ladder. Seedling ADU Builders Paradise offers free estimates in Paradise for any maintenance or repair work tied to a home addition, garage conversion, or ADU, and every estimate is a written price before any work starts. Call (833) 856-4236 to schedule yours. A live person answers every call, day or night, throughout the project.
Frequently Asked Questions
Wait 60 to 90 days before final drywall and paint touch-ups. New drywall, joint compound, and paint all continue to cure and shrink for weeks after the project closes. Touch a hairline crack too early and it reappears through the new paint within a month. Give the addition 60 to 90 days to finish settling, then do the cosmetic work once. Call (833) 856-4236 if you want an exact quote on professional touch-up work in Paradise; estimates are free.
The roofline junction connects new framing to old framing, and the two move at different rates during the first three months. Fresh caulk and flashing at closeout look tight because they were just installed; by 90 days the framing has dried and shrunk enough to open a gap that is invisible from the ground and invisible from inside the attic. A 90-day check from above catches it while it is still a five-minute fix.
Turn on every appliance in the new space at once and note whether any breaker trips. Then run a space heater on each new circuit for 20 minutes and feel the outlet face and plug. Warm is normal; hot to the touch is not. If a circuit trips repeatedly or an outlet runs hot, call a licensed electrician. Electrical work carries real risk, and no homeowner should open a panel to investigate. Call (833) 856-4236 for a free estimate from a licensed local pro in Paradise.
The exterior caulk and flashing check. Paradise’s summer UV degrades sealants faster than most homeowners expect, and the freeze-thaw cycles here open any hairline crack that water finds. Two exterior walks per year, one in June and one in November, prevent most of the water intrusion problems we see in home additions across Paradise.
Yes, and more than most people realize. A dated paper log with observations, actions, and photos gives a buyer confidence that the addition was cared for, not just finished. It also resolves any warranty question about whether the homeowner did their part. Keep it in a binder with the project documents and manufacturer paperwork, and hand it over at closing. Buyers pay for certainty, and a maintenance log is certainty in paper form.
Not much. A wood-framed ADU in Paradise settles on nearly the same schedule as a home addition, so the checklist in this guide applies to both. The main differences are the panel manufacturer’s warranty terms, which ship with the ADU from brands like Cover, Dvele, and Mighty Buildings, and any mechanical systems unique to the ADU. File those alongside your log. For anything that feels beyond your capacity, call (833) 856-4236 to schedule a free estimate in Paradise.
The Bottom Line
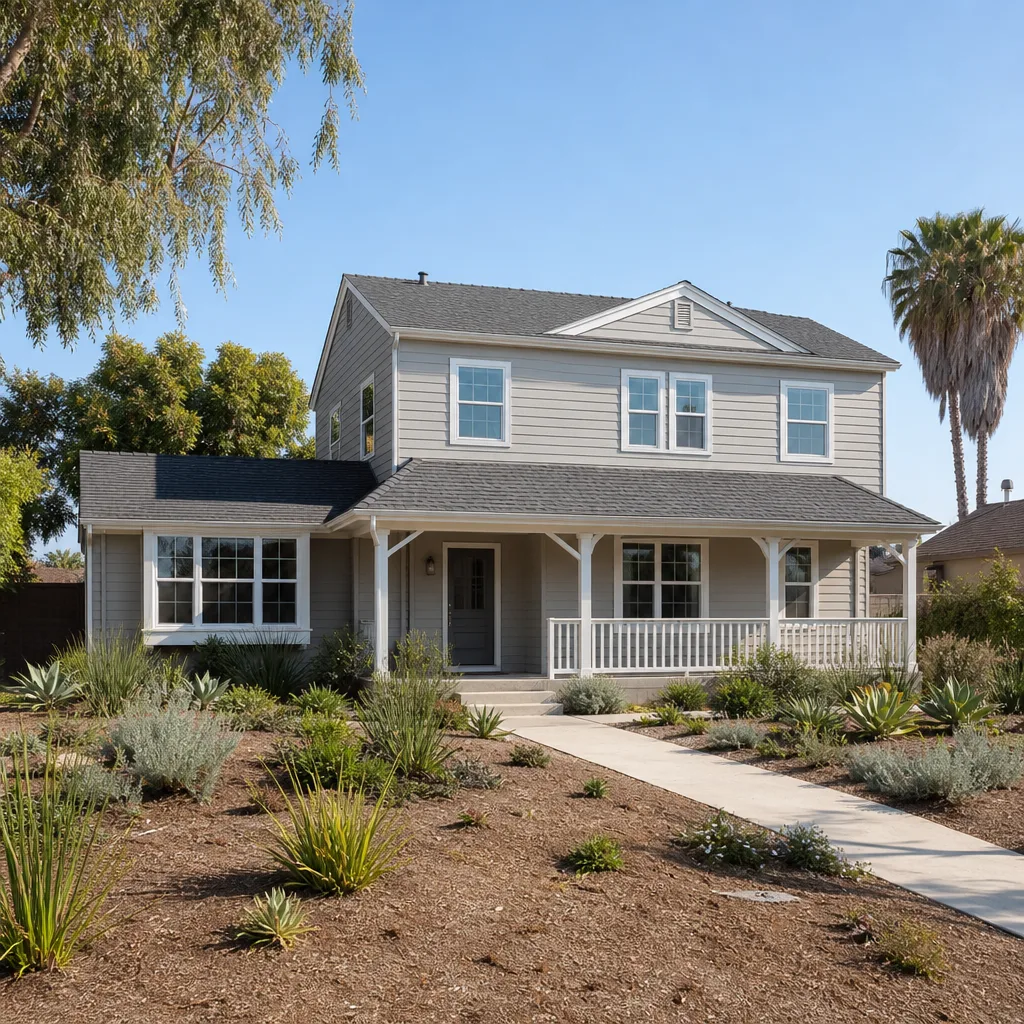
The first year after a home addition is finished is the most important maintenance window you will ever have. Check the roofline junction at 90 days from above. Test new electrical circuits under real household load in months four and ten. Wait 60 to 90 days for drywall and paint touch-ups. Walk the exterior twice a year for UV and freeze-thaw. Keep a paper log that protects you in any warranty conversation and pays you back at resale. None of this is hard, and all of it is easy to skip. The families who don’t skip it spend less on repairs and sell with more confidence. When a check turns into a job, call Seedling ADU Builders Paradise at (833) 856-4236 for a free estimate in Paradise, with a written price before any work starts and the 365-Day Done Right Promise behind every job.
Written by the team at Seedling ADU Builders Paradise.